Checking if 7segment display is common anode or cathode
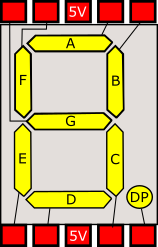
If you've got a 7 segment display but are not sure if it is common anode or common cathode, then you need to check the polarity of the display. This is easily done with a low voltage supply (9V or less) from a battery, bench PSU or Arduino board. Firstly and before anything else, connect a 1K resistor between the common pin and the battery. This will avoid potential damage to the LED's in the display.
Arduino single 7 segment analog measurement example
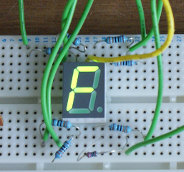
Measuring voltage from an analog input. Following on from the previous example ( example for driving 7 segment LED displays ). we now build on the same circuit to make a simple voltage meter. Additional requirements: Potentiometer of at least 10Kohms. In order to measure voltage, we need to use an Arduino board analog input. Usually these are marked separately as “analog in”. We are going to use a potentiometer to adjust the voltage at the analog input.
Arduino multiple digit, 7 segment display tutorial
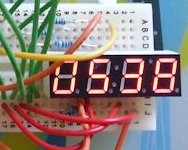
On the previous page covering single digit displays, we dealt with driving one 7-segment digit. On this page we’ll use a multi-digit display and assume 4 digits. Just like single devices, multi-digit 7-segment displays have connections for A-G, DP and common, but they have a common pin for each digit, with one set of A-G and DP pins that are shared. So for a 4 digit display there will be four common pins.
Wiring a 20x4 character display to an Arduino board
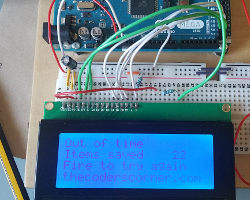
In this article I describe how to wire a 20x4 character display to an Arduino. I'm assuming you are using a regular 5V 8bit Arduino, if this is not the case this article will not work for you as you'll need voltage level converters. Most character based LCD displays use the same wiring, but I can't guarantee that all will be the same. If your display is the same it will look like the diagrams on this page and will have 16 pins.
Embed Control developer version for controlling and monitoring Arduino
There are two versions of Embed Control desktop UI, the first is built into TcMenu Designer and is aimed at developers and more advanced users that fully understand the menu tree, and may want to create customize views. The second version is a user-centric Embed Control packaged for App Stores and available from the App Store for that platform. This version will also support mobile devices running iOS and Android soon.
Control embedded menu application from browser - embedCONTROL.js
Instead of the desktop version, on Raspberry PIs you can serve a React.JS based single page web application that needs no installation. It works on a wide range of mobile phones, desktop and tablet devices. It is not supported in the Arduino or mbed environment directly at the moment. Using the deployed app To open the app, simply browse to the device on the configured host and port. For example if the device were 192.
Arduino Game library for 20x4 display
<img class=" titleimg" alt="Arduino Game Board 20x4" src="/images/electronics/arduino/games/game-library-20x4.jpg"/> Here we discuss a game library that provides an easy way to write games with 20x4 parallel display and a few micro-switches. There is quite a lot of stuff going on in this library, so I'd like to start slow and build up. First, let's start by taking a look at the parts needed to use this library: 20x4 display (other size will work too) 4k7 resistors (at least 6) 220R or 330R resistor for backlight Microswitches for joystick 1uF capacitor to smooth PWM Arduino and breadboard!
Low power Arduino menu using tcmenu library
In this article we’ll discuss building a low power Arduino menu using tcMenu library. We will use a TFT screen and a rotary encoder connected to a PCF8574 device. The device will be SAMD MKR board. I’ve picked this choice purposely, because it’s non-trivial, and requires a lot of digging to make sure power usage is a low as possible. Running an Arduino menu on battery If the device can be powered from the mains, then power usage is probably not the biggest issue.
Arduino 7 segment LED display tutorial
In this tutorial I show you how to connect a 7 segment display to an Arduino board. For a tutorial showing how to drive 4 or 8 digit displays see (Arduino multiple digit, 7 segment display tutorial). Firstly, we must know what type of display we have as there are two possible forms, common cathode and common anode. If the display is common cathode, then the LOWER voltage side is common, if the display is common anode, then the HIGHER voltage side is common.
